Jörgs Digital Imaging Page
Home |
Science and Software

Why do two colours, put one next to the other, sing? Can one
really explain this? (Pablo Picasso)
This page is a collection of tips and links about scanning,
digital photography, image conversion and related topics
- in short, "digital imaging".
General Information:
Image resolution |
Filesize
Image treatment:
Storage format |
Format conversion |
Two images in one |
Multiple copies of same image |
HTML |
Colour correction |
Red Eye correction
Imaging:
Scanner as camera |
Archival with date-time stamp from Digital Camera
Presenting the results:
Make a visual Directory ("Album") |
Adding annotations |
CD autoload
Miscellaneous:
Scanning in Linux |
What SCSI card? |
Links
Almost all common image storage formats are more or less compressed.
The size of the "uncompressed" image (in memory) can be calculated by
considering size and colour depth. An example:
- A 35 mm slide (24×36 mm) scanned at 2400 dpi (2400 dots per inch, equal to 945 pixels per cm) ...
- ...gives an image size of 2268×3402 pixels, which is roughly 7.7 millions of points ("Megapixels").
- Let's assume the scanner supports a colour depth of 24-bit.
- With 8 bit being 1 byte, the resulting image file has a size of 7.7 millions×3 bytes = 23.1 Megabytes.
Another example:
- A photograph of 10×15 cm, scanned at 150 dpi (60 pixel/cm) ...
- ... gives an image size of 600×900 pixels, that is, a total of 540000 points.
- At 24 bit (3 bytes) colour depth, the resulting image is 0.54 millions×3 bytes = 1.62 MB in size.
- As a black/white image (8-bit "colour" depth, e.g. 256 shades of grey) the resulting image is 0.54 millions×1 byte = 540 kB.
If you scan lots of images (especially slides), you may want to
make sure to have an appropriate archive medium at hand.
I archive my scanned images on CD-ROM.
Generally speaking, you can always downsample a high-resolution image, but it is difficult to enhance a low-resolution file.
Digital photography: Usually, I take pictures at the full resolution of the camera and store the images in JPEG format.
If available, I use a quality setting of "high" for small cameras and "medium" or "high" with high-end cameras.
In exceptional cases (like studio photography), I may even use the RAW format.
Scanning photos: For archive purposes and when the object is of sufficient quality (slides, film negatives), I use a slide scanner
and archive at 1600 or 2400 dpi. This is pretty much "borderline" since the film grain will start to be visible: The Kodachrome 64 film,
famous for its fine grain, was specified with a resolution of 100 lines/mm under good conditions (contrast 1000:1). This resolution
translates to 2540 dpi. With a contrast of only 1.6:1, the same film is specified at 63 lines/mm or "only" 1600 dpi.
However, if you need to scan low-cost prints, resolutions higher than 150 dpi will probably not make much sense.
For publishing on the web, I scan at a resolution that gives the final image size, or at a higher resolution followed by downsizing.
Example: a photo ("print") of 10×15 cm that shall give an image of 400×600 pixels. In this case, with 10 cm = 4 inch, the
required resolution calculates as 400 pixels/4 inch, or 100 dpi.
You may want to store graphics in a format that is lossless and suited for this purpose.
There are many storage formats available. One of the most widely known is the JPEG file
format, which is used by most digital cameras. However, JPEG was specifically designed for
continuous-tone images such as photographs - it is clearly unsuitable for graphics,
computer screenshots etc.
I store almost all of my "non-photograph" raster images as PNG files. The PNG (Portable Network Graphics)
format is a file format for the lossless, portable, well-compressed storage of raster images and it is free from patent issues.
PNG are still rather large files (roughly 25% of the calculated file size),
but I feel that it is preferable to store high-quality images as "master copy".
Later on, they can be converted to any "lighter" format as needed.
Conversion between different image formats, even (to a certain degree) between vector and pixel graphics, is easily done with the
ImageMagick
package. It is part of almost any Linux distribution and allows to display, convert, annotate, animate, transform ... images.
Let us convert a number of BMP files into PNG, using bash:
for i in *.bmp ; do convert "$i" "${i%.*}.png" ; done
If you have lots of files to convert, you may want to use parallel processing
(source and more ideas):
ls -1 *bmp | parallel convert '{}' '{.}.png'
If you need to do this through several subdirectories, use find and feed the resulting list to convert.
The resulting PNG file will be placed in the same directory as the source file:
find . -type f -name "*.gif" -print | while read i ; do convert "$i" "${i%.*}.png" ; done
If you want to place the resulting files somewhere else:
find . -type f -name "*.gif" -print | while read i ; do convert "$i" ~/path/to/$(basename "${i%.gif}.png") ; done
Convert PNG to JPG and create both thumbnails (150×100 pixels) and the "final" format (750×500 pixels), using bash:
for i in *.png; do
  fn=${i%.*}
  convert -verbose -comment "(C) Joerg Hau" -geometry 750x500 $i ${fn}.jpg;
  convert -verbose -comment "(C) Joerg Hau" -geometry 150x100 -quality 35 $i ${fn}_i.jpg; done
done
Note the low quality factor (0.35) for the thumbnail images - the smaller they are, the faster the page loads. If you put images on a
web page, you want them to be "as light as possible".
I keep scans of various cards — such as ID, driver license and credit cards — as backup copies (e.g. on a thumb drive when I'm travelling).
On a conventional scanner, we need to scan the two sides of the cards separately ... but I do not want to keep two separate files for one card.
Thus, I like to combine them into one file:
convert driver-license.*.jpg -gravity center -append driver-license.jpg
This will "stack" the two input files, one above each other. If you want to have them side by side, simply swap -append against +append.
If you want to stack 4 images in a 2x2 array, try this one:
convert \( img*.png +append \) \( img2*.png +append \) -background none -append array.png
A similar use case is the creation of multiple copies of the same image, e.g. for ID photos.
As an example, let's create an image that contains 8× the same headshot and that can be printed by an online print service:
- Passport photos should be 45×35 mm in size.
- The original photo is, say, 1621 pixel in height, and it was resized to match the required width (1260 pixel).
- We will order a 4×2 print in "10.2 cm" size.
To get the right amount of "padding", simply use the rule of three: 1621×10.2/4.5 = 432. This is 4× the required padding
(since we will print 2 rows of photos, each with a padding on top and bottom). Thus, the padding to be used is 432/4 = 108 pixel.
Now, combine the photos with ImageMagick. Since we will print 8× the same image, we would need to repeat the filename 8×
... but fortunately, bash can take care about that:
montage -geometry +108+108 -tile 4x2 $(printf 'infile.jpg %.0s' {1..8}) outfile.8.border.jpg
Source for the bash trick: superuser.com.
Panorama photos are great souvenirs. A technical challenge is that these photos are very large -
almost unusable in a web browser. We cannot simply use the resizing above, since this would reduce the
image size too much ... but ImageMagick provides a solution:
If we specify only a fixed height (here, 900 px) but not the width; the image size will then be adjusted accordingly.
In bash:
for i in *pano*; do convert -verbose $i -resize 'x900' ../img/${i}; done
To create the necessary HTML hyperlinks for all images and thumbnails created above, issue the following lines
in a bash shell and paste the output into your favourite HTML editor:
for i in *.png ; do
  fn=${i%.*}
  echo '<a href="'${fn}.jpg'" ><img src="'${fn}_i.jpg'" width="150" height="100" alt="'${fn}'"></a>'
done
Note that this assumes "all-landscape" orientation, so you have to
"flip" the orientation of some images manually in the final HTML document.
Further down this page you can find a script for this task.
Sometimes the scanned images present a "false" colour, or are too dark.
I encounter this problem frequently when I scan slides that were exposed
in bad weather - the result is often blueish and too dark
(Digital cameras seem to excel under such conditions ;-)
Of course you may correct this by hand on a slide-per-slide base. However,
often you can apply the same correction step to all slides in a given set
- which calls again for a few lines in a Linux shell (here, tcsh).
The following lines convert slides from .tif to .jpg and at the same time
the gamma value for the red, blue and green channel is increased separately
(1.3/1.3/1.2):
foreach i ( *.tif )
  set fn=$i:r
  convert -gamma 1.3/1.3/1.2 $i ${fn}.jpg
end
One example is shown here. First the slide "as acquired" and then the
image that resulted from conversion with -gamma 1.7/1.7/1.6
(a somewhat extreme case):
Especially with compact cameras, I frequently encounter images where people have "red eyes". This is usually caused
by the electronic flash which is located too close to the axis of the camera.
Using The GIMP, this effect
can be corrected as follows:
- Zoom onto a red eye.
- Use the rectangle or ellipse tool to mark the eye, including pupilla and iris.
- Context menu | Select | Select by Color.
- Select enough "Fuzziness" (ca. 50).
- Selection mode on "intersect".
- Now mark an "average red" pixel.
- Verify that the selection is good enough (red button in the lower left corner). Correct if necessary.
- Context menu | Image | Colors | Hue-Saturation.
- Select "Magenta" and "Red" and reduce the values for Lightness and Saturation.
(Many thanks to Tibor D. from ch. comp!)
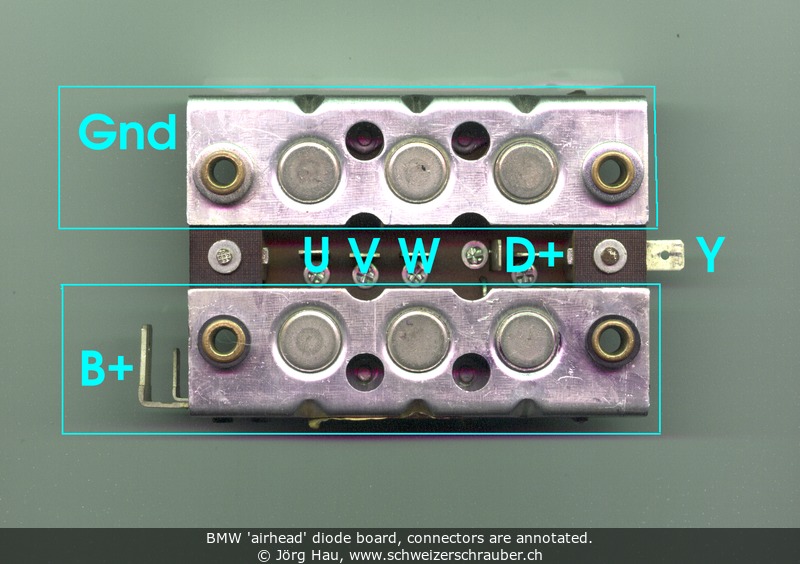
A flatbed scanner can be used to take "photos" of small (and not-so-small)
objects. For this purpose, the most important feature of the scanner is the
depth of the focal plane - some scanners can only make images that are
a few mm in depth, others support objects of 1...2 cm quite well.
To give a few examples, here is an extract of my wallet (left) and
the diode plate of my motorcycle
(right). In both cases, I just put the object(s) on the - clean - glass plate
of the scanner and started the scan. Annotations were added later.
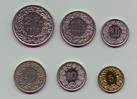
Note that my old flatbed scanner, a HP Scanjet 5P (C5110A), falsified the
colors of metallic objects a bit. This is probably due to polarisation effects.
Most digital cameras store photos with the date/time stamp when the picture was taken.
I use this to archive my files based on their date, which avoids dealing with filenames like dsc0211.jpg.
The script below searches for a string that looks like a date and renames the file based on ISO8601 notation, i.e. yyyyMMddThhmmss.
Potential duplicates - that is, files taken at the same second (!) - are renamed as file.jpg, filea.jpg, fileaa.jpg
... you get the idea.
 Click here to download the
rename_photos.sh script.
Click here to download the
rename_photos.sh script.
Adjusting the date/time stamp as such is much more tricky, since you need to observe a number of caveats about rollovers.
For this purpose, I use exiftool, which is part of the Perl module Image::ExifTool (in Fedora: package perl-Image-ExifTool).
The following example shifts the creation date/time of an image by subtracting one hour and 11 minutes;
note that the original file is modified:
exiftool -CreateDate-='0:0:0 1:11:0' img.jpg
Another example: adjust the three tags CreateDate, Date/Time Original and ModifyDate
at the same time, by adding one hour. This is what I will use when I forget to set my camera to daylight saving time:
exiftool -AllDates+='0:0:0 1:0:0' img.jpg
You can use the same tool to find which photos (here: in the current directory) were taken with a specific camera:
exiftool -a -r -Model -Filename -T 20240525* | grep Canon
Renaming of files according to their last modification time can also be accomplished
using a built-in feature of the find command. Here is an example with video files:
find . -type f -name "*avi" -printf "mv %f %TY%Tm%TdT%TH%TM%TS.avi\n"|sh
Another example, without the seconds and attaching the original filename after the DateTime stamp:
find . -type f -name "*MPG" -printf "mv %f %TY%Tm%TdT%TH%TM-%f\n"|sh
Here is a more exotic example: renaming screenshots from a mobile device that do not have embedded image information
(i.e. we cannot use exiftool), just by parsing the filename and re-arranging its parts in ISO 8601 style.
The tricky part with filenames like 'Photo 13.01.21 19 56 13.png' is that we need to use multiple delimiters,
and fortunately the delimiter in awk can be a regular expression:
for i in Photo*; do mv -v "$i" `echo $i | awk -F'[ .]' '{print "20" $4 $3 $2 "T" $5 $6 $7"."$8}'`; done
Yet another one, this time for renaming files that use underscores such as Screenshot_20210113_181500.png':
for i in Screen*; do mv -v "$i" `echo $i | awk -F'_' '{print $2 "T" $3}'`; done
Renaming avi files based on the date-time stamp of the file:
for i in *.avi; do fn=`stat --format=%y --terse $i | tr -d '-' | tr ' ' T | tr -d ':' | cut -c -15`; mv -v $i ${fn}.avi; done
To present digital pictures, I usually put them in the format of an HTML page so that it can be visualised on any computer,
and using any web browser. The page generation is largely automated by a shell cript that I called makealbum.sh. It supports:
- selection of the final image size (1024x768, 800x600, etc)
- selection of the thumbnail size
- individual selection of images
- individual selection of image rotation (left, right, keep) on a per-image base, or automatic rotation (f the camera supports this feature)
- extraction of EXIF data
- creating a JavaScript-based slide show (many thanks to Florian Grosse-Coosmann!)
- and it does never change the original files!
The actual image conversion process is separated from the "user input" process, so you do not need to wait in between :-)
All files are transformed on-the-fly into the parent directory, with automatic generation of thumbnails and of valid HTML code.
Download the makealbum.sh script. Updated 2009-01-08.
Download the dropshadow.pl
script, required to add the DropShadow effect on-the-fly. This is a barely
modifed script by Erich Lerch that uses the Gimp-Perl plugin. Updated 2005-03-08.
A related script is makealbum_name_tags.pl. It is a simple perl script that replaces
text strings in one file based on a list in another file (see the file itself for the details).
I use it to replace the date-time stamp (in the "name" tags of the HTML files generated by makealbum.sh)
with textual descriptions.
Download the makealbum_name_tags.pl script.
Yet another ;-) related script is makealbum-multipages.sh. It is a bash shell script to create multiple
HTML files that reference each other - something that I needed for multi-page trip reports in HTML format
(e.g. one HTML page per day). In practice, I set up the "framework" with makealbum-multipage.sh, then do the
image conversion/rotation etc. with makealbum.sh and copy the corresponding sections from
makealbum.sh's output into the files created by makealbum-multipages.sh.
Download the makealbum-multipages.sh script. Updated 2008-01-25.
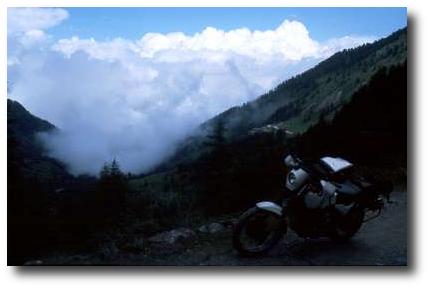
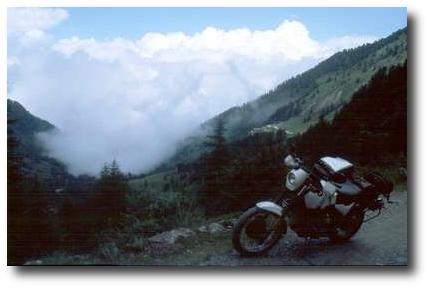
You can see some pages prepared with this script e.g. on my motorcycle pages.
This is actually a complement to the scripts above. img_annotate.sh
allows to add text under a jpeg image from the command line.
I use this frequently to add comments, descriptions or names into photos, such as the text in this image.
The script requires the name of the image to be treated, plus the text
... e.g. img_annotate.sh 01.jpg "My comment is here". The resulting file
is stored with a different name (here: 01t.jpg ... "t" for "text" ;-), so
the original file is never modified.
Download the img_annotate.sh
script.
If you burn your image albums onto CD and would like to start a "slide show"
automatically, there are numerous programs available that perform this purpose.
However, a pretty easy trick that I frequently use for CDs with images (presented as
"HTML picture album") is the following:
- Create a file
index.html that contains the navigation through your CD.
- Create a file
autorun.inf with the following content:
[autorun]
open=autorun.bat
- Create a file
autorun.bat with the following content:
@echo Launching "index.html"...
@start index.html
@exit
- Make sure the files are "DOS type" (i.e. using CR+LF at the end of a line), otherwise they may not work in MS-Windows 9.x.
- Put all three files in the root directory of your CD, then burn the CD.
If you insert this CD into the CD drive of an average MS-Windows system, the CD will
launch your default web browser with the presentation.
Using scanners under Linux is easy with the sane package
(sane stands for "Scanner Access Now Easy").
Even better: Linux allows also to use your scanner over the network!
There are actually several ways to do this.
Scanning via ssh
One simple option is to run the scanner via ssh.
In the following example, you do not even log into a full session on the remote computer since we only execute a single command.
The resulting file ends up on our local computer:
ssh user@remote scanimage > image.jpg --format jpeg
If the command does not support sending its output to stdout, we can simply cat the output like this:
ssh user@remote "~/bin/scan2pdf.sh -E test.pdf && cat test.pdf" > test.pdf
Here, the disadvantage is that the file will continue to exist on the remote computer.
Scanning with the SANE daemon
Another option, which even works across platforms, is the "SANE daemon" (saned).
This is part of the SANE distribution and provides remote access to the scanner functions.
To configure the SANE server (that is, the machine where the scanner is physically attached to),
proceed as follows (valid for Debian-based systems as of 2022):
To configure a SANE client (that is, the PC that is supposed to receive the scan),
edit /etc/sane.d/net.conf and add the name (or IP address) of the SANE server. That's all.
If you are interested in scanning documents to PDF, please refer to my documents page.
Note: This section was written at a time when USB did barely exist and most scanners needed an interface card.
In the 21st century, you will most probably use a USB scanner.
Does your scanner "block" the PC while you are scanning?
This is not the "fault" of the scanner - it is the interface card.
There are several types of SCSI hostadapters ("SCSI cards") on the market.
Those usually delivered with low-cost scanners are generally working in PIO mode,
which means that the processor of the PC takes care about all the data transfer
between your scanner and the harddisk. Expensive, "real" SCSI adapters have
their own processor onboard and work in DMA mode, freeing the processor
completely.
Here's data from a little experiment I performed several years ago:
The scanner used here was a Highscreen "Scanner 600", a low-cost but well-working
flatbed scanner with 600 dpi optical resolution. The "object" scanned was an
ordinary phonebook.
The tests were run on a generic Pentium-II 233 MHz with 64 MB RAM and ABIT BE6
motherboard. The PC was running SuSE Linux 6.3 with Kernel 2.2.13, with no other
applications running.
Scanning was performed from the command line: time scanimage
--mode col
--resolution 300 -x 160 -y 230 > test.png. All acquisitions were
repeated three times; data were averaged (the standard deviation was neglible).
Results:
- Adaptec AVA-1502 (AHA152x driver) ... 60 s CPU time, 63% CPU load,
1:35 min total time.
- Adaptec AHA-1542 (AHA1542 driver) ... 0.08 s CPU time, 0.1% load,
1:36 min total time.
Conclusions:
The total time used for the scanning process does not depend
on the type of SCSI adapter: it was identical in both cases.
The big difference lies in the CPU time that is used for the scanning process!
The AVA-1502A is a low-cost adapter working in PIO mode. It keeps the
CPU busy most of the time (60 seconds here). What this means? Well, the PC
will be occupied with data transfer all the time. It will have a lousy
response to the user's input - the mouse feels "sticky" and under Win95 the PC is
unusuable during the whole scanning process!
On the other hand, the AHA-1542 is an old, but "true" SCSI card
operating in DMA mode. It frees the computer's CPU completely from workload - it
spent only 80 ms (milliseconds!) of time on the process! Sitting in front of
the machine, you will not be able to say if the PC is doing something on the SCSI
chain or not. The PC behaves "as normally" and the scanning process does not
influence usability.
As a consequence, you may want to get a SCSI adapter that supports
Bus Master DMA and you may want to stay away from the cards that support only PIO
modes. They are cheaper and you will feel the difference.