Linux on the Fujitsu LifeBook B142
Home |
Science and Software
Installing Linux |
Performance
Note: The material on this page is no longer updated. I keep this page merely as reference material:
With a recent Linux distribution, the installation on a portable computer is now as easy and straightforward
as the installation on a desktop or a server. Most of the issues described here are therefore "non-issues"
with a more recent computer.
Preface
This is a description of my Linux installations and some more experiences, on a Fujitsu LifeBook B142.
I acquired this notebook in 2001-09 secondhand and used it for several years, until I sold it in 2009-12
- still fully operational after all that time (and thousands of km on the motorcycle ;-),
but it was no longer appropriate for my needs.
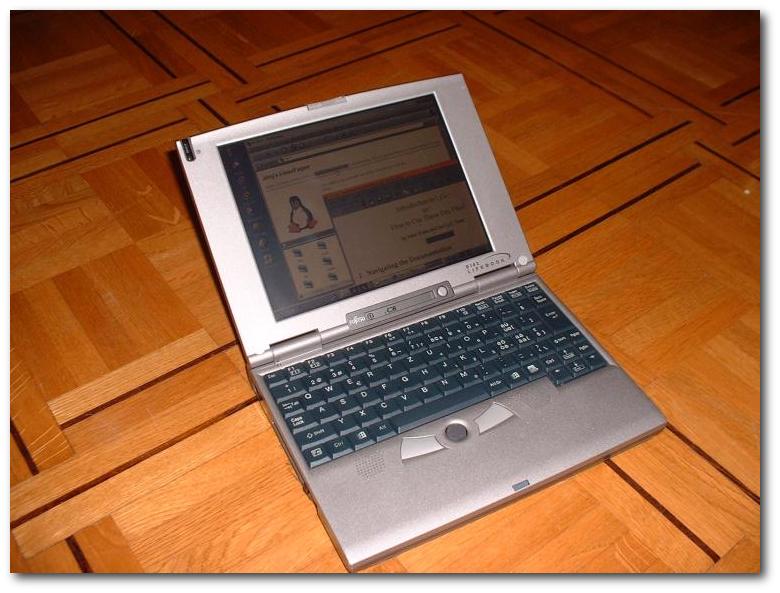
The B142
Essentially, the B142 is a small notebook PC with Celeron-300 Processor, 4.2-GB harddisk,
800x600 colour touchscreen, one PCMCIA slot and two USB ports. It is equipped with an internal modem and IrDA.
The notebook has been officially discontinued and the technical details, MS-Windows drivers etc. are no longer available at the
Fujitsu website.

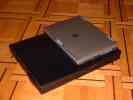
What made me buy this machine were two things: First of all, the B142 is a very compact, portable computer,
with the size of just about a DIN A5-sized agenda and 1.1 kg ... and what had always annoyed me with so-called
"portable" computers was the fact that they are not really portable but huge and heavy.
The B142 is thus considerably more compact than any standard "notebook" computer and it can easily be carried along
in a suitcase, or on a motorcycle.
This computer was at its time what you call a netbook today.
- The second feature that jumped to my eyes was the touchscreen. The built-in pointing device is complemented by a
soft plastic pencil (just like that of a PDA), which is much faster than the mouse. And ... it works under Linux!
The overall disk size of 4.2 GB is largely sufficient to install a dual-boot system with
Linux and MS Windows. The machine had Microsoft Windows 98 pre-installed, with one partition
of approximately 3 GB and another of 1 GB; the latter had apparently been used as Backup drive.
As I use MS Windows only for "compatibility reasons", there was no need to keep that
partition very big - some 800 MB were enough for my purpose. The rest was going to be used
for Linux, with a swap partition, about 900 MB for /home and the rest into one
big root partition.
Harddisk upgrade: Mark Srebnik reported that he has successfully replaced
the 4.2 GB stock harddisk with a Seagate 100GB 5400 RPM Momentus series drive.
Thus, the B142's BIOS version 1.02 apparently recognises the geometry of such big drives
correctly ;-)
Usually I remove all existing partitions from disk and do a "clean" partitioning and
install from scratch, but as Windows 98 was already installed I thought it would be a
nice occasion to try the GNU partition editor parted.
The HDD parameters are 559x240x63 (CHS) and the original Partition was as follows
(C:H:S notation):
hda1    FAT            0:1:1 to 423:239:63  3'205'408 Bytes
hda4    extended
hda5    FAT          424:1:1 to 558:239:63  1'020'600 Bytes
Having launched the GNU partition editor parted, I found that it requires
the partition sizes to be given in MB. Now, as a matter of personal taste I like it
when hard disk partitions end on on complete cylinders, so I needed to figure out
suitable partitioning parameters. I used the Ranish Partition Manager for this,
and it told me that the new hda1 would nicely end on 110:423:63,
with a size of 839'128 bytes. I launched parted again ... and upon printing
the existing configuration I noticed that the Ranish Partition Manager uses
a different calculation of the disk size. The "correct" calculation for parted
is as follows:
value for parted = (value from ranish/1024) + offset 1st cylinder
For the above partition, this calculation gives 819.492 (offset 0.031).
I launched parted again and entered the command resize 1 0.031
819.492. Indeed: in spite of a fragmented Windows partition with lots of files
at the "upper end", it took just about 1 min to finish resizing.
A quick verification showed that the calculation was indeed correct.
Even better: upon reboot, Windows started correctly and a thorough check of
the HDD using scandisk did not reveal any problem - perfect!
I then repartitioned the free disk space for Linux, again using
Ranish Partition Manager:
hda2   Linux swap      111 to 130
hda3   Linux reiserfs  131 to 450        /
hda4   Linux reiserfs  451 to 558 (end)  /home
The choice of reiserfs was made with respect to the fact that this is a
portable computer, somewhat more exposed to power failures than a desktop PC.
Reiserfs is now at such a maturity level that I did no longer hesitate.
And after all, reiserfs performs well up to now ;-).
The swap space set above is 160 MB, which is identical to the maximum amount
of RAM that can be installed. This notebook came with only 32 MB RAM, but it
could be used smoothly under MS Windows 98. No problem for Linux either, as long
as lightweight windowmanagers like Blackbox, IceWM or Windowmaker were used.
However, using KDE led to enormous swapping activities, which is why I soon
upgraded to a full 160 MB.
Increasing the memory requires an appropriate amount of disk space for the
hibernation file, which equals the amount of RAM plus some extra MB for
configuration data. For the different amounts of RAM, the size of the hibernation
file is (to my knowledge) as follows:
- 32 MB requires 36'047'872 bytes
- 96 MB requires 108'380'160 bytes
- 160 MB requires 171'315'200 bytes (170'265'600 bytes if the Fujitsu program is used).
To change the size of this file, a utility called phdisk.exe is used under
MS Windows. The version delivered with the B142 can apparently only be used with a
fresh install, but not if the size of RAM is changed later on ... well, to make a long
story short: You can download a more recent version of phdisk.exe at
the DELL support website, which worked just fine with my B142.
If you run into trouble during creation of the hibernation partition, run Windows'
scandisk before relaunching phdisk.exe. There is one exception:
If you encounter problems due to non-contiguous disk space, scandisk would take
too much time. Instead, simply launch GNU parted and resize the windows
partition twice: First reduce its size in order to bring all files into the "lower end"
of the disk, then re-expand it to its original size. The resulting disk space is clean
and does not contain any files.
In my case, this was resize 1 0.031 400 followed by resize 1 0.031 819.492.
There is a Linux version of phdisk, however this is at present only capable of
formatting a suitable partition, not a file. As I already had four primary partitions
on the disk, I did not want to mess those up and preferred to stay with a
hibernation file, not a hibernation partition. Note that this file is
located on the Win98 partition, i.e. the effectively usable space on this partition
is about 680 MB.
Time to install Linux.
Over the years, my Lifebook has seen SuSE Linux 7.1, 7.3 and finally (before I sold it) 9.0.
The notes below refer to 9.0, but references for the older versions are given where necessary.
Generally, I do not want to change any CDs during setup. With three computers in our
"home network", all running Linux, I have the content of the SuSE CDs copied
to one of my disks and this directory is exported read-only via NFS.
To install Linux on the LifeBook, I simply installed the "port replicator" with
the floppy drive, inserted the PCMCIA network card and booted from floppy
(the nootebook is so tiny that the floppy and CD attach externally).
SuSE Linux immediately recognised the PCMCIA chipset and launched setup
(note: SuSE 9.0 requires disks 1 and 4).
The installation went without problems. You may want to include the following packages,
if they are not already selected:
To have a high-resolution text mode upon boot,
I changed the vga= line in the boot file (either /etc/lilo.conf
or /etc/boot/grub/menu.lst) to vga=788.
The B142 is equipped with a touch panel (which is one of the reasons why I
bought it ;-). A touchpanel driver for XFree 4.x is available at
Kenan Esau's website. The driver simultaneously
supports the touchscreen as well as the built-in "quickpoint" pointing device of the
LifeBook. Since version 0.6.8 on it works with all windowmanagers that I have tried
(Windowmaker, Blackbox, KDE and others).
This driver is based on
Harald Hoyer's Touch Panel Driver for the B142, which was developed for XFree 3.x.
One problem that I encountered initially was that the touchpanel did not react
as well to a "click" as it did under MS-Windows. This can be changed easily in
/etc/X11/XF86Config, by setting ClickTimer to "0". Note that in this case
DragTimer must be > 0, otherwise the drag function will not work.
The two relevant sections of my B142's XF86Config
file are shown below.
Note that the entry for InputDevice "Mouse" ist commented out: the driver
for the touchpanel already offers that functionality, so two drivers would conflict
with each other.
Section "InputDevice"
    Identifier "touchscreen"
    Driver "lbtouch"
    Option "Device"	"/dev/psaux"
    Option "DeviceName"	"touchscreen"
    Option "MinX"	"40"
    Option "MinY"	"90"
    Option "MaxX"	"980"
    Option "MaxY"	"890"
    Option "ReportingMode"	"Raw"
    Option "Emulate3Buttons"
    Option "Emulate3Timeout"	"50"
    Option "SendCoreEvents"
    Option "DragTimer"	"1"
    Option "ClickTimer"	"0"
EndSection

Section "ServerLayout"
    Identifier  "Layout[all]"
    InputDevice	"Keyboard[0]"	"CoreKeyboard"
    InputDevice	"touchscreen"	"CorePointer"
#   InputDevice	"Mouse[1]"	"CorePointer"
    Option 	"Xinerama"	"off"
    Screen	"Screen[0]"
EndSection
Update Notes for users of Kernel 2.6: (I'm still using the 2.4 series,
so I'm posting this information "as is" - don't ask me ;-):
It seems that the management of /dev/psaux has changed considerably in
the 2.6 series. This impacts, among others, all touchscreen drivers of the B142.
Kenan Esau has now updated its
touchpanel driver to Kernel 2.6. The version for Kernel 2.4 is still
available at the same site.
Sau Dan Lee has also written a
driver
to re-enable the touchscreen functionality.
The sound card is identified as an ES1969 Solo-1 Audiodrive which is
readily recognised and configured. Upon testing in YAST2, mount the volume
to about 50 units to hear something.
Note: With SuSE 7.1, the soundcard locked up the B142 upon a
warm reboot, independent from all the BIOS settings I have tested. This
problem did no longer occur in SuSE 7.3, nor in 9.0.
The PCMCIA chipset, including hot-swap, just works like a charm.
My B142 came with a Trendnet TE-210CT network card, which provides
a 10 MB/s connection.
In /etc/sysconfig/hotplug, I use the following settings:
HOTPLUG_NET_DEFAULT_HARDWARE="pcmcia"
HOTPLUG_START_NET="yes"
HOTPLUG_START_USB="yes"
HOTPLUG_START_PCI="no"
HOTPLUG_START_IEEE1394="no"
... and in /etc/sysconfig/pcmcia:
PCMCIA_SYSTEM="external"
PCMCIA_PCIC="i82365"
If you use multiple network connections - such as a fixed IP address
at home and DHCP at work - you may want to look at "schemes".
These are pre-set configurations that are described in /etc/pcmcia/network.opts.
All that is needed to switch between the "home" and "office" setup is
to invoke cardctl, e. g. cardctl scheme office to switch
from any other scheme to "office", or cardctl scheme home
when you are back home.
With the upgrade to SuSE 9.0, I was facing the particular problem that the
network card (configured as eth-pcmcia) was no longer properly removed when I
ejected and re-inserted the card. Solution: install the package wireless-tools
... PCMCIA relies on it to insert and remove kernel modules.
The B142 has two serial ports. One is a "true" RS-232 port at
/dev/ttyS0, while the second port is at /dev/ttyS3.
The latter is the Infrared port, located at the left side of the
computer. To use it, enable it in the BIOS (seems to be disabled
by default) and set IRDA_PORT to /dev/ttyS3.
As an IR LED consumes quite a bunch of energy I prefer to have this
running only when I really need it, so I start and stop manually ("rcirda start").
IrDA can be used for a number of things - printing, or data exchange with
other devices, such as a Palm.
For printing, I have an HP Laserjet 5MP that came with IRDA port -
something I had never used before, but now I really like it: Just configure
lpd to connect to /dev/irlpt0 ... then, hold the notebook so that its
IrDA port faces the printer's and go ... it's almost magic ;-)
Setting up the IrDA connection to communicate with a Palm OS device (Palm III
and Palm Vx) turned out to be easy. Just create /dev/pilot as a symlink
that points to /dev/ircomm0:
    chmod 666 /dev/ircomm0
    ln -s /dev/ircomm0 /dev/pilot
In addition, make sure that you have a line like export PILOTRATE=115200
in your ~/.bashrc.
After starting the IrDA services, point the Palm somewhere in the direction of the
B142s IR window and run a test like pilot-xfer -l. It may take a few seconds
to connect, but then you should see a list of the databases on your Palm. Happy synch'ing!
Note: With SuSE 7.3, communication over IrDA only worked if the PCMCIA
network card was removed.
The modem identifies itself at a Lucent Winmodem. Fortunately there are
drivers for this modem available; you can download the latest package ltmodem-xx.tar.gz
from www.heby.de (as of 2018-06, this link seems to be dead).
Later versions of SuSE Linux include the ltmodem driver as a ready-to-use rpm package.
—
Internet access works without problems, although I never get a true V.90 connection. It's always V.42.
Notes for SuSE 7.3: Install the kernel sources, extract the package and follow the
instructions in the 1ST-README file (if you upgrade the kernel later on,
re-build the drivers again, using the fresh sources). With this, /dev/modem
is linked to /dev/ttyLT0.
Do not forget to set the same entry for MODEM also in /etc/rc.config - you
must do this manually, as YAST does not know this device and if you forget this
entry, the next run of SuSEconfig will reset the link.
It took me a while to find out, but on my B142 I have to remove the PCMCIA
network card to use dial-up connections. If the card (Trendnet TE-210CT,
NE2000 compatible) is left in, the modem will still dial and establish the
ppp connection, but afterwards the data exchange with the remote computer
stops; there are only a few hundred bytes exchanged.
The same phenomenon applies for the IRDA port.
In SuSE 9.0, the dial-in tool kppp no longer sets the correct default route.
This bug can be fixed by modifying /etc/ppp/ip-up:
In section ppp*), at the beginning of the first case ... ip-up) instruction
and just before start_firewall (in the SuSE 9.0 original script, this is line 204),
add the following:
    # add default gateway (JHa 20050212)
    /sbin/route add default gw $REMOTEIP
Fax: On my "big" PC at home I used HylaFAX, which is not that easy
to set up but powerful. However, on a small, usually single-user machine like
a Notebook it would probably be oversized. Thus, on my B142, I use
efax, a small but
well-designed piece of software. It is straightforward to set up and easy to use.
The modem shares an IRQ with the PIC. Call setserial /dev/modem irq 5
to assign it to irq 5.
The original harddisk of this notebook is pretty fast; hdparm -t /dev/hda
showed 9 MB/s of throughput, which I could not improve. I even found
that some hdparm settings were dangerous: As an example, enabling
DMA causes problems during shutdown if the system was in hibernate state
before. Good to have Reiserfs ;-)
In /etc/sysconfig/powermanagement, set APMD_SET_CLOCK_ON_RESUME
to "yes" and APMD_STOP_SOUND_BEFORE_SUSPEND to "alsa", then run
SuSEconfig. Do not forget to actually activate the APM daemon (apmd ;-).
(SuSE 7.3: These parameters are in /etc/rc.config.d/apmd.rc.config; in
addition, set START_APMD="yes" in /etc/rc.config.).
Fast enough
In its default configuration with 32 MB RAM, the machine performs
very well under MS Windows 98. Under Linux, it is required to use a "light"
windowmanager, such as Windowmaker or Blackbox. Using KDE 2.2 with 32 MB
RAM resulted in severe swapping and an incredibly slow system.
However, once the upgrade tom 160 MB RAM was performed, the machine
was almost as fast as my "home" PC at that time, a Celeron-400 with 128 MB RAM.
Recent versions of KDE (from 3.3 on) have much reduced memory requirements anyway ...
A slight disadvantage of such a lot of memory is that it takes "some" time to
be written to disk: swapping 160 MB to the hibernation file takes about 30 s.
Waking up takes about the same time, plus a few seconds to reset system time etc.
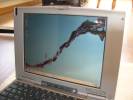
An amazing screen
The screen resolution is at an amazing 120 dpi, which yields a clear
and crisp picture. The only problem is that lighting is a bit weak if you
work off the batteries in a bright environment.
But ... one day, I arrived in the office as usual and took the B142 out of my rucksack ...
and found a fine crack that went across the screen from the lower left to the upper right corner.
Amazingly, the touchpad still works, but the screen is slowly getting black, pixel by pixel, around the cracked zone.
The picture was taken about three years after that incident. Interestingly, this did not
deteriorate much further until I sold this laptop.
The B142 is equipped with a Li-Ion battery. When I acquired this notebook,
the capacity of the battery was still sufficient for more than three hours of work
with not-too-much harddisk activity, but about one year later the battery
capacity decreased quite suddenly: Within a few days, it dropped from 2 h
to less than 20 min.
To obtain a new battery, Fujitsu/Siemens Switzerland turned out to be the
least expensive and also the fastest source:
It cost about 220 CHF (including shipping) and was delivered within two
working days (in 2002-09). With the fresh battery, the autonomy of the B142
was close to 4 h again.
Astonishingly, battery performance started to degrade again after 11 months,
but in this case Fujitsu/Siemens Switzerland took over the costs for the replacement.
I have asked Fujitsu/Siemens what procedure they recommend to ensure
longest battery life. The answer was to use the battery as frequently as possible,
and only hook the notebook to the 220 V line to recharge it.
The part number of the battery is CA54200-0472; it's a 10.8 V,
3200 mAh battery.
unison
To synchronise between a Laptop and other PCs or workstations,
I use unison. This is a file-synchronization tool
which allows two "replicas" of a collection of files and directories to be
stored e.g. on a portable computer and a desktop. The files can be modified
separately and unison propagates the changes in each replica to the other.
Unison has the particular advantage that it can deal with updates to both
"replicas". Updates that do not conflict are propagated automatically, and
conflicting updates are detected and displayed before any action is taken.
The configuration (i.e., which directories to synchronise, what to ignore etc.)
is held in a plain-text configuration file which is specified on the command line.
This enables to use different configuration files for different computers:
I synchronise data on my LifeBook with my desktop computer and I
synchronise other - even partially "overlapping" - data on the same
LifeBook with a server at my workplace.
All that is needed is a network connection - preferably ssh -, and
a copy of unison installed on each relevant computer. The details are
explained in the - excellent - manual and tutorial.
As a side note, I now use unison also with a memory stick, which is
quite practical as it avoids me to carry my laptop for the "daily sync"
between workplace and home.
Dealing with different versions of unison
After upgrading my primary computer to a more recent version (from Fedora Core 6 to Fedora 8),
I ran into the problem of having different versions of unison on a number of computers, in particular on this laptop
that is still running SuSE 9.0.
Now, upgrading all copies of unison was going to be tedious due to a number of dependencies, so the solution
was to provide an "old" copy (with matching version number) on the Fedora 8 system, in addition to the actual one.
For this, I downloaded the FC6 rpm package and extracted only the binary:
cd temp
wget ftp://fr2.rpmfind.net/linux/fedora/releases/8/Everything/i386/os/Packages/unison-2.13.16-3.fc6.i386.rpm
rpm2cpio unison-2.13.16-3.fc6.i386.rpm | cpio -i --make-directories
mv usr/bin/unison /usr/local/bin/unison-2.13
The switch --make-directories means to put all the files relative to the temp directory, instead of the filesystem. -
With that, I have the "recent" copy of unison in /usr/bin/ and the"old" version available as /usr/local/bin/unison-2.13.
All that remains now is to add one line to the corresponding profile on the client(s), so that the correct version is chosen automagically:
addversionno=true
According to the manual: "When this flag is set to true, unison will use unison-currentversionnumber instead of just
unison as the remote server command. This allows multiple binaries for different versions of unison to coexist conveniently
on the same server: whichever version is run on the client, the same version will be selected on the server."
- If I invoke the synchronisation command from the server (i.e. where the two different versions are available), I need to call the specific version:
/usr/local/bin/unison-2.13 b142